[pinit]As you all know, I am by no means a professional DIY-er. In fact, most of the Pinterest projects I tried have been Pinterest pitiful! That is.. except for the one I tried this past weekend. 
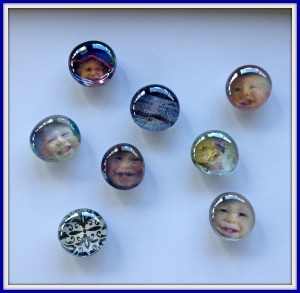
And, I am going to provide you all with a simple tutorial, because one slightly frustrating thing about the project was that I had to keep switching back and forth between two Pinterest posts to get all the details. So, hopefully this will be a one stop shop for you!
Let’s go ahead and dive right into it:
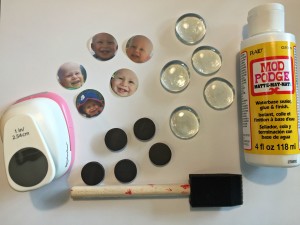
Supplies
- Mod Podge Matte
- 1 inch Circle Punch
- Small Pictures or Scrap Book Paper
- 3/4 Inch Magnets
- Marble accents
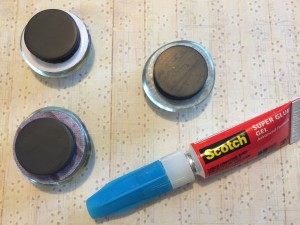
- Super Glue (Pic below)
- Foam Brush
Ok, let’s talk supplies from a non DIY-er perspective.
Mod Podge~ There are A LOT of different types of Mod Podge! So, be sure to either zoom into pic before going to the store or click on the Amazon link to find the exact type for this project.
Circle Punch~ You will want to find the 1 inch circle size. I actually found mine at Michaels. And, there were a ton of types to choose from that threw my non DIY-er self for a tale spin.. so be sure to pick the right one. 
Magnets~ This was another thing that stumped me… I finally decided on the 3/4 inch circle magnets at Michaels and those worked perfect!
Glass Marble Accents~ You can find these at many different places. I actually found mine at the Dollar Tree. Yippee! The ones I got worked just fine, but I think next time that I would consider a higher quality. There were some with imperfections on the flat side of them that could be seen through to the top when using pictures. However, if you are just using scrap book paper, the imperfections cannot be detected.
Now I already had the Super Glue and Foam brush. But, you can also find these at Michaels.
Ok, here comes the fun part!
Step 1: Print your pictures. You will want to print them smaller than usual. I used the “Contact Sheet” option. Now cut out all your pictures with the Circle Punch.
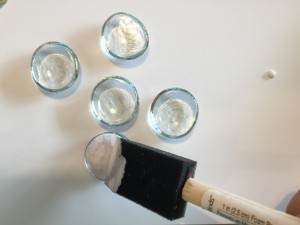
Step 2: Pour a little of the Mod Podge into a bowl. (I used a disposable bowl.) Use the foam brush to add some Mod Podge to the back of the glass marble accents. Gently place the pictures to the back of them. You will then want to paint the back of the picture with Mod Podge to seal the picture. Keep the marble pieces turned upside down for at least 20 minutes to let dry.
Step 3: Once dry, you’ll want to glue on the magnets. Add super glue to one side of the magnet and then press tightly to the Glass Accent. Let dry for at least 3 hours before using.
Voila! You have completed a Picture Perfect Pinterest Project! ! :):)
*This post contains affiliate links, noted by asterisks. For more information, see my disclosures here.*
This post is linked to:
